The digital textile printing industry has seen rapid growth over the past decade as more and more users move towards digitizing textile printing. The use of digital printers allows you to inculcate ease, simplicity, fabric performance, texture, and most importantly, a huge variety of colors into fabrics, thus making the whole process reliable and cost-effective overall. There are several processes that fall within the scope of digital textile printing. In this article, we will mainly discuss the Direct to Film Printing (DTF) process.
Popular textile printing processes
- Digital sublimation printing
- Digital textile printing
- Direct print on film
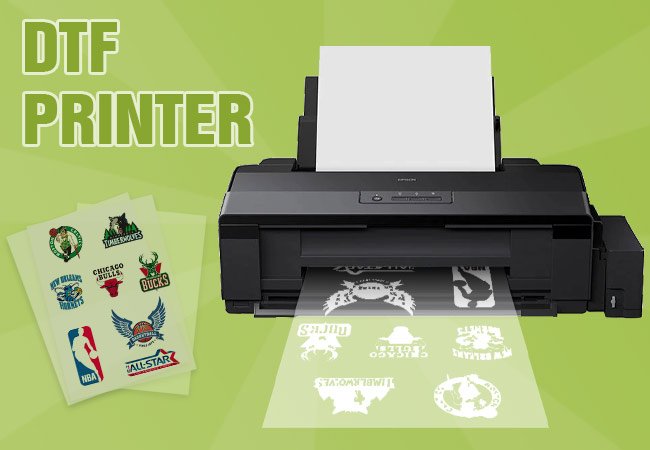
What is DTF printing?
The DTF process is as simple in its operation as the name suggests: printing on film and direct transfer to fabric. The most important factor that makes this process worthy of being used by more people is the freedom to choose almost any fabric. Whether it’s polyester, cotton, silk or synthetic fibers like rayon or terry, the DTF printing process is sure to do its magic on them.
Prerequisites for DTF printing
The requirements for DTF printing do not require a heavy investment from the user. Whether it’s someone who is currently engaged in one of the aforementioned digital textile printing processes and wants to move to DTF printing as an extension of the business, or someone who wants to venture into digital textile printing starting with a dtf printer one needs to invest in the follow up. –
- Direct Film Printer: These printers are often called DTF printers and work with 6 colors. This provides convenience of operation as CMYK DTF inks can be fed into standard CMYK tanks while the printer’s LC and LM tanks can be filled with white DTF inks. The rollers used to scroll the page are also removed to avoid the appearance of “coatings” on the white layer printed on the DTF film.
- Films : PET films are used in the DTF printing process. These films are different from those used in screen printing. These have a thickness of about 0.75mm and better transfer characteristics. In the language of the market, these are often referred to as DTF Transfer Films. DTF films are available in the form of single sheets (usable for small-scale use) and rolls (used with a commercial setup). Another classification of PET films is based on the type of peeling that is performed after the transfer. Depending on the temperature, the films are either hot peel or cold peel type
- Software – Software is an important part of the process. The printing characteristics, the color performance of the inks and the final printing performance on the fabric after transfer are strongly influenced by the Software. For DTF, specialized RIP software capable of handling CMYK and white colors would be required. The color profile, ink levels, droplet sizes and other factors that contribute to an optimized print result are all governed by the DTF printing software.
- Hot-Melt Adhesive Powder – DTF printing powder is white in color and acts as an adhesive material that binds the colored pigments in the print to the fibers of the fabric. There are several grades of DTF hot melt powder specified in microns. An appropriate grade should be selected based on the requirements.
- DTF Printing Inks : These are specially designed pigment inks available in cyan, magenta, yellow, black and white. White ink is a special component that lays the white base of the print onto the film and onto which the colored design is printed.
- Automatic Dust Shaker – The Automatic Dust Shaker is used in commercial DTF setups to apply powder evenly and also to remove excess dust.
- Curing oven – Curing oven is basically a small industrial oven which is used to melt the hot melt powder which is applied on the transfer film. Alternatively, a heat press can also be used to do this, but it should be used in non-contact mode.
- Heat press machine – The heat press machine is mainly used to transfer the image printed on the film onto the fabric. It can also be used to heat the hot melt powder on the DTF film. The method to do this is given in the process described below.
Direct film printing (basic steps)
Step 1: Print on Film
Instead of plain paper, insert the PET film into the trays of the printer. First print the entire blank image on the PET film. Next, using the appropriate color settings in the printer, print the required image on the white image layer. The important point to remember is that the print on the film must be a mirror image of the actual image that is to appear on the fabric.
Step 2: pulverization
This step consists of applying hot melt powder to the film on which the image is printed. Dust is applied evenly when the print is wet, and excess dust should be carefully removed . The important thing is to make sure that the powder is evenly distributed over the entire printed surface of the film. A very common way to ensure this is to hold the film on the short edges so that the long edges are parallel to the floor (landscape orientation) and pour the powder into the center of the film from top to bottom so that it forms about 1 pile. one centimeter thick in the center from top to bottom. Collect the film together with the powder and fold it slightly inwards so that it forms a slight U with the concave surface facing you. Now shake this film from left to right very lightly so that the powder spreads slowly and evenly over the entire surface of the film. Alternatively, automatic agitators available for commercial configurations can be used .
Step 3: Dissolve the powder
As in the name, in this step the powder is dissolved. This can be done in a number of ways. The most common way is to put the film with the printed image and the applied powder into the curing oven and heat. If the curing oven is not available, place the film inside the heat press and move the top of the press closer to the film without touching it. There should be a gap of about 4-7mm between the film and the top plate of the heat press. A wire can be used to secure the top of the press so that it does not close completely on the film and leave a necessary gap. For best results, it is highly recommended to follow the manufacturer’s specifications for powder melting . Depending on the powder and the equipment, heating is generally done for 2-5 minutes with the temperature around 160 to 170 degrees Celsius .
Step 4: pre-pressing
The phase involves pre-pressing the fabric before the image is transferred by the film. The fabric is held in the heat press and pressurized under heat for approximately 2-5 seconds . This is done to flatten the fabric and also ensure that the fabric is dehumidified. Prepress helps in the correct transfer of the image from the film to the fabric.
Step 5: transfer
This is the heart of the DTF printing process. The PET film with the image and the fused powder is placed on the pre-printed fabric in the heat press for strong adhesion between the film and the fabric. This process is also called ‘healing’. Hardening occurs at a temperature between 160 and 170 degrees Celsius for about 15-20 seconds . The film is now firmly attached to the fabric.
Step 6: cold peeling
It is important that the fabric and the film now attached to it cool to room temperature before peeling off the film. Since hot-melt is similar in nature to amides, on cooling it acts as a binder that holds the colored pigment in the inks in firm adhesion with the fibers of the fabric. Once the film has cooled, it must be peeled off the fabric, leaving the required design printed in ink on the fabric.
Step 7: post-pressing
This is an optional step, but is highly recommended for best results and high performance parameters such as wash and rub fastness. At this stage, the final fabric with the transferred design is pressed into the heat press for approximately 10-15 seconds .